Sputnik SFF case
an HTPC enclosure


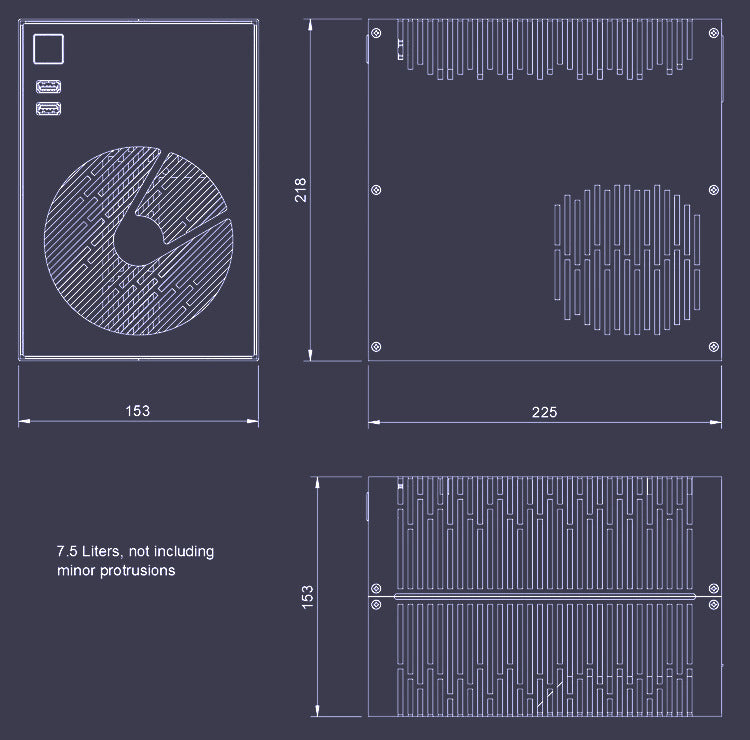
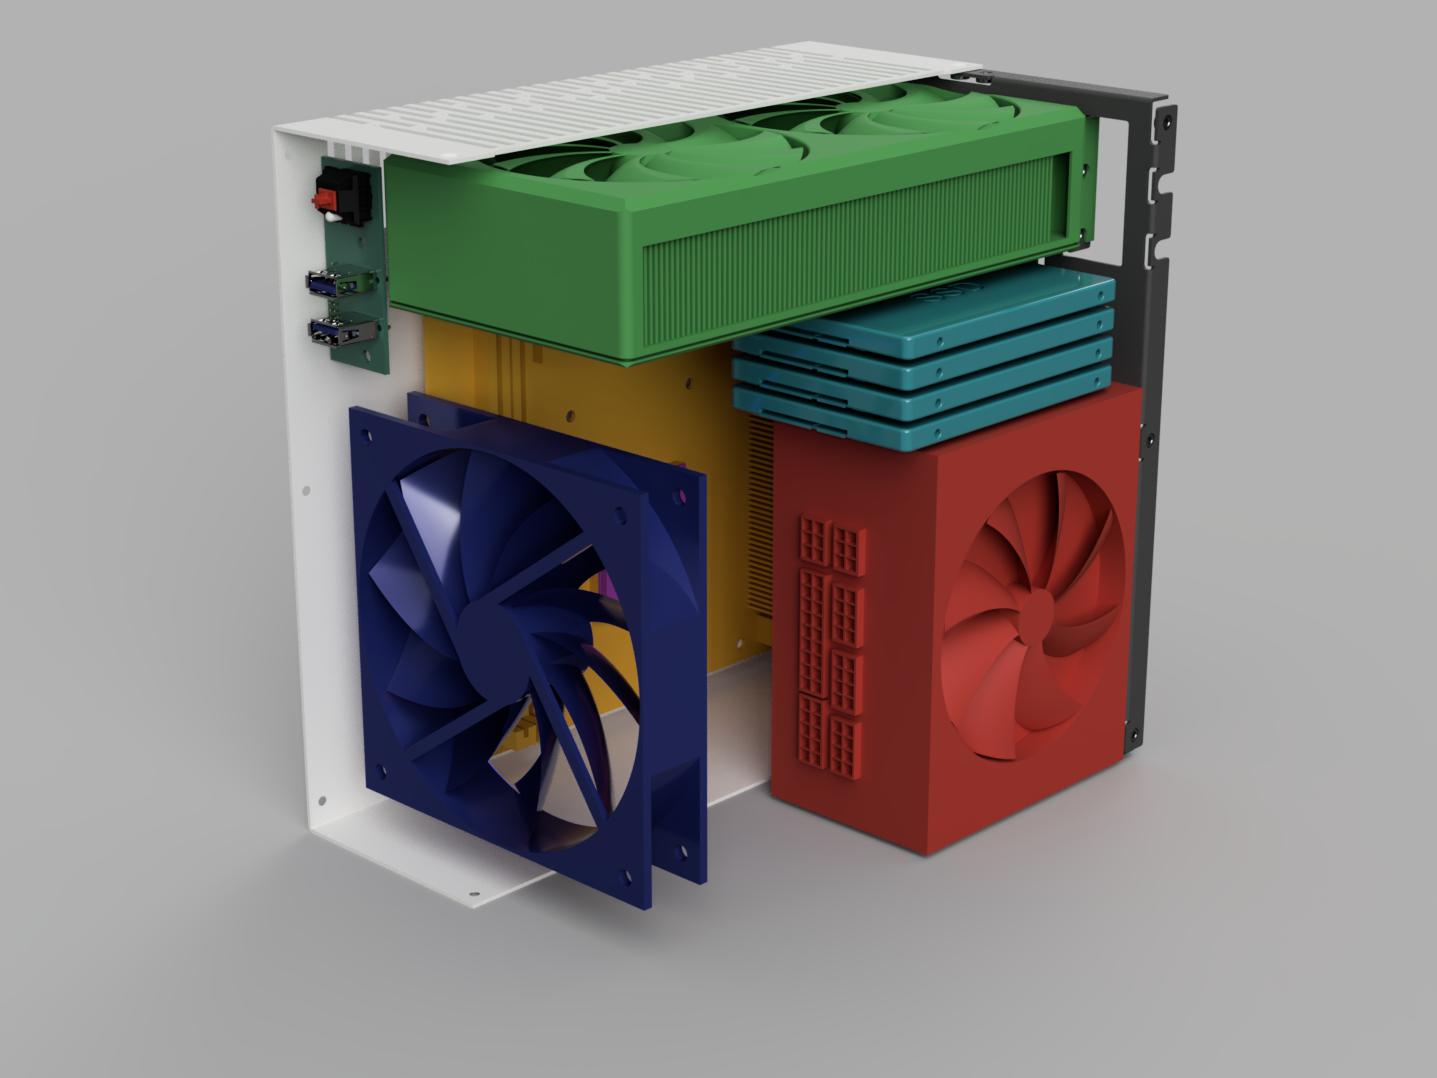
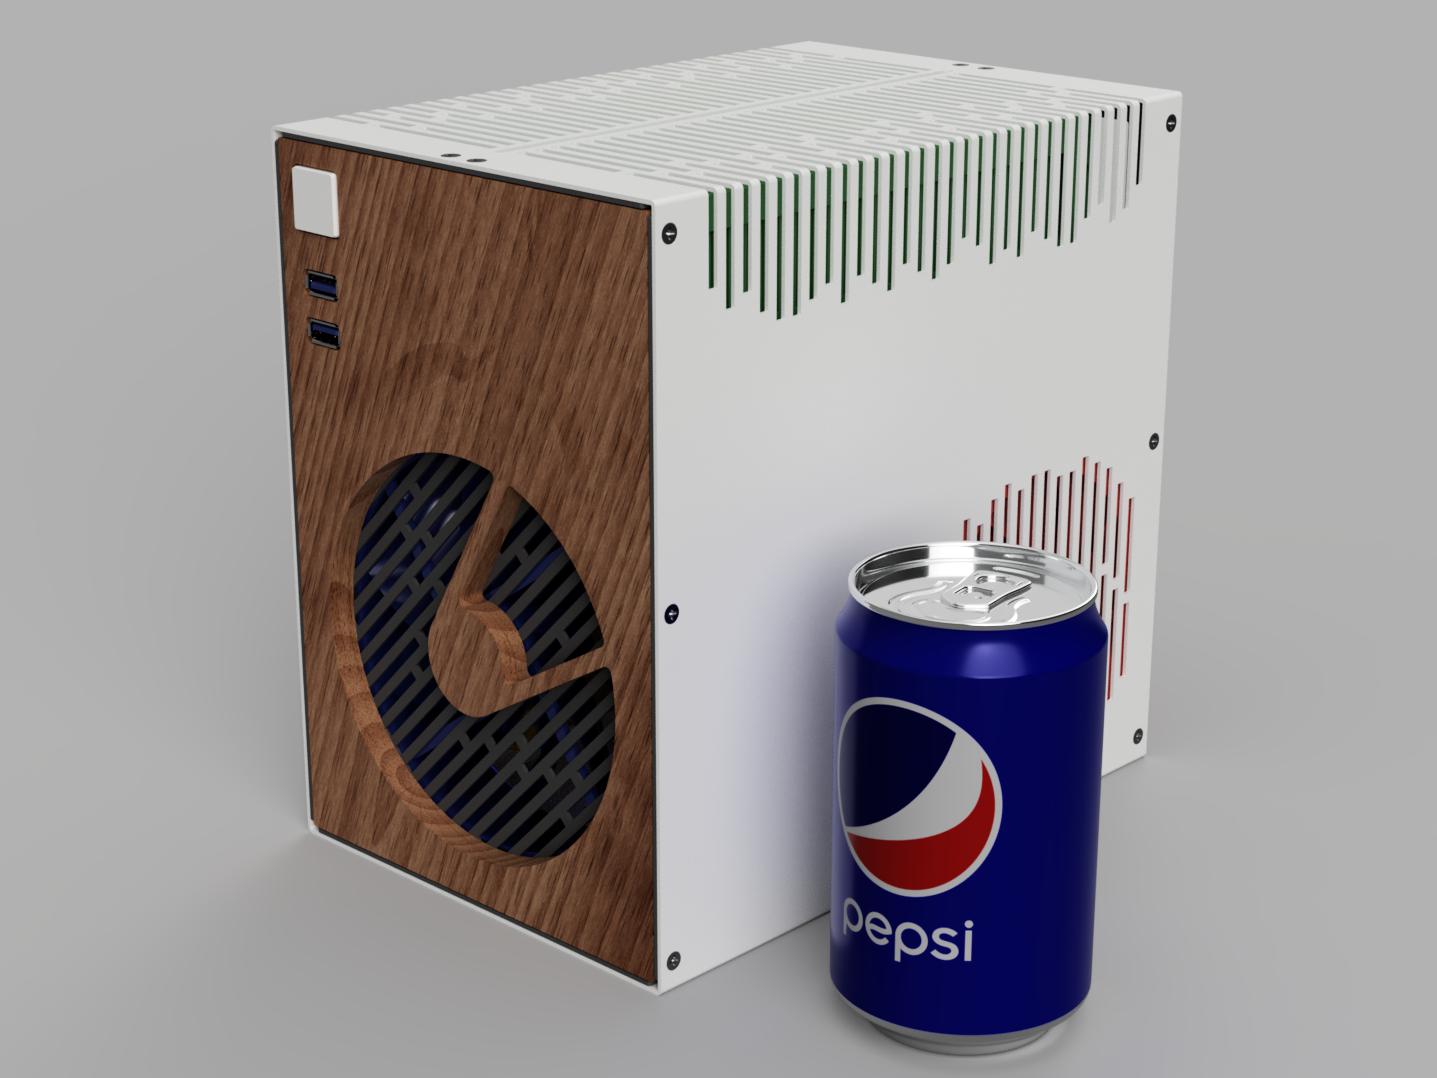
This is the Sputnik. A 7.5 litre case designed with aesthetics and storage in mind. The primary goal of this design is to house 4 2.5" SSDs to act as a storage array for your home server. But this is an HTPC that can also take a small GPU for some light duty couch gaming.
The front panel is a minimalist design out of walnut wood, with a Cherry MX switch as a power button, and two USB3.0 ports on a custom PCB.
The sheet metal, wood, and plastics are manufactured locally in Ontario, Canada.
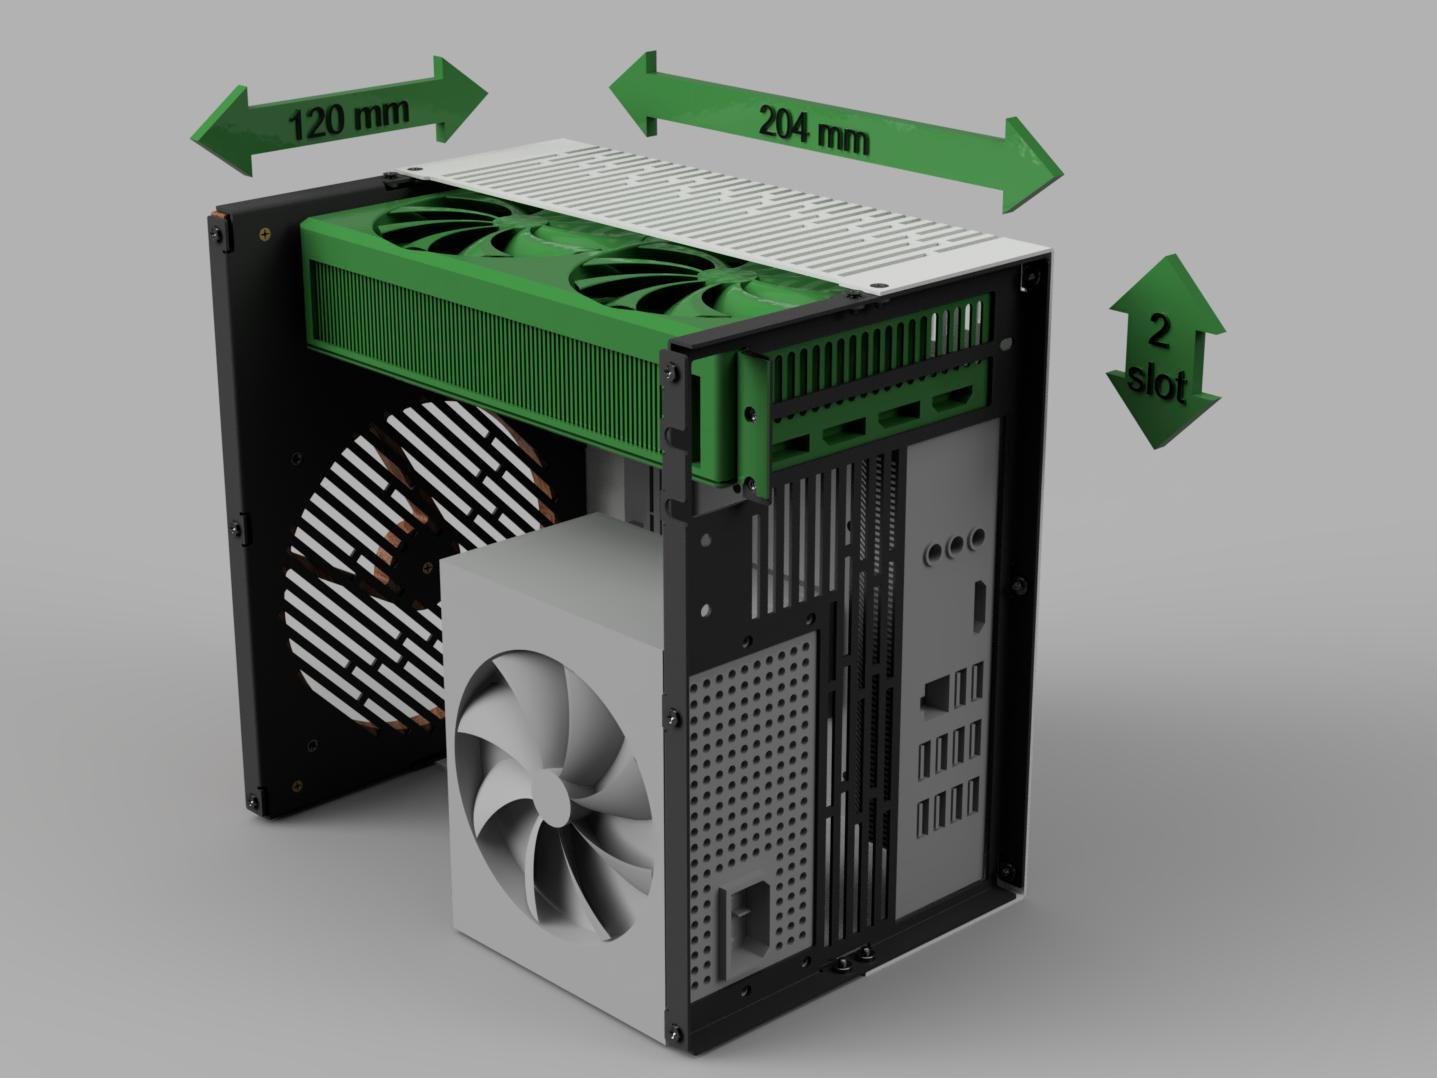
GPU
A 204mm long, 120mm tall, 2 slot GPU will fit into the Sputnik. Although there are some provisions for a thicker gpu, the intermediate thicknesses are not standardized so fitment is not guaranteed. A standard 2 slot card will have some clearance against the top vents to help mitigate turbulence and noise. For very tall cards, a 180 degree power adapter may be required
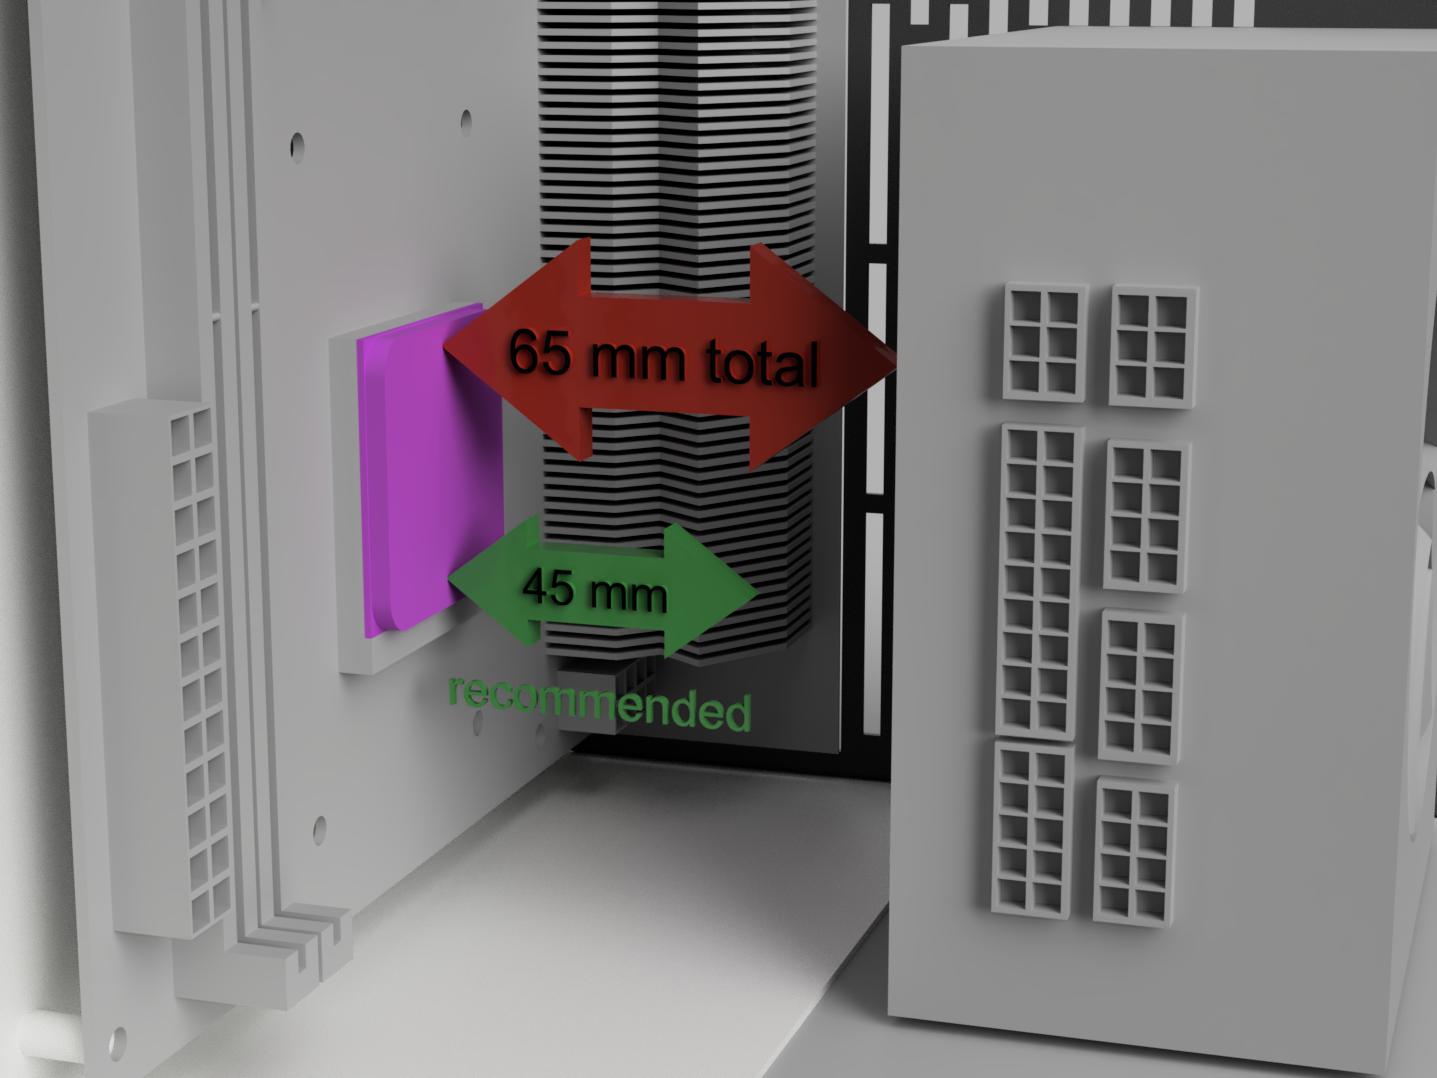
CPU cooling
A roughly 45mm tall cooler is recommended. The physical amount of space between the CPU and the power supply directly above it is 65mm, but abutting a fan against a solid panel will not yield good results. It is best to leave around 20mm of room between the fan and solid panel to maintain adequate airflow, thus the 45mm height recommendation.
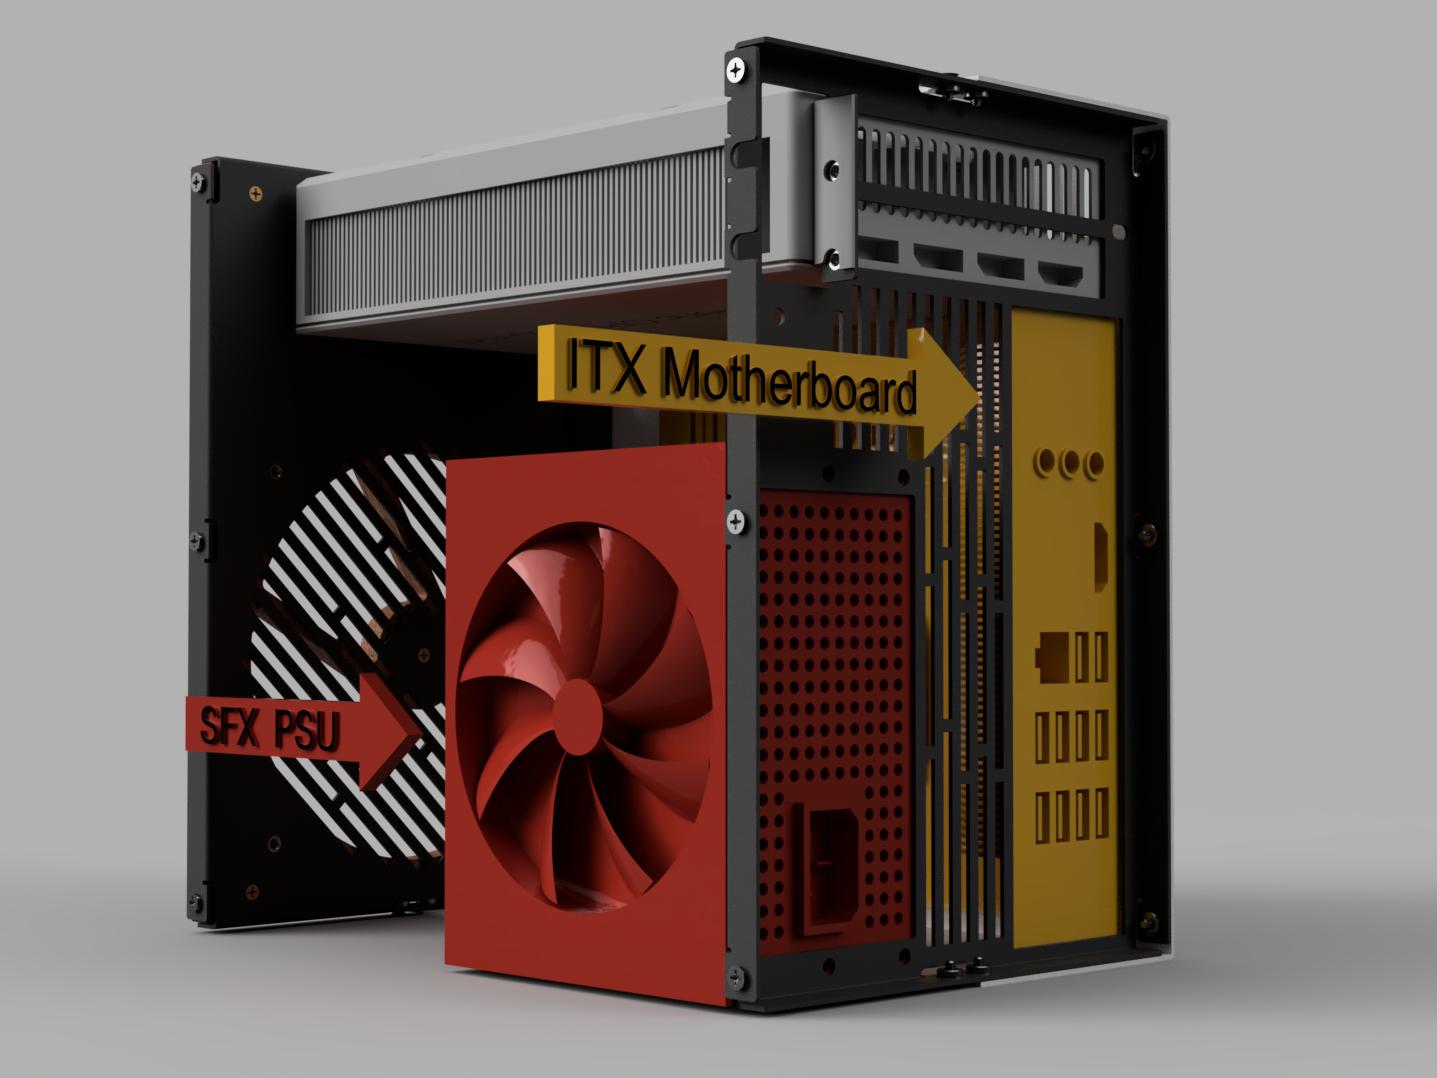
PSU and Motherboard
The Sputnik is designed for an SFX power supply. SFX-L will fit, however the cooling vents are only sized for an SFX unit.
The intended motherboard for this case is a mini-ITX. Although fitment has not been confirmed a DTX board may fit.
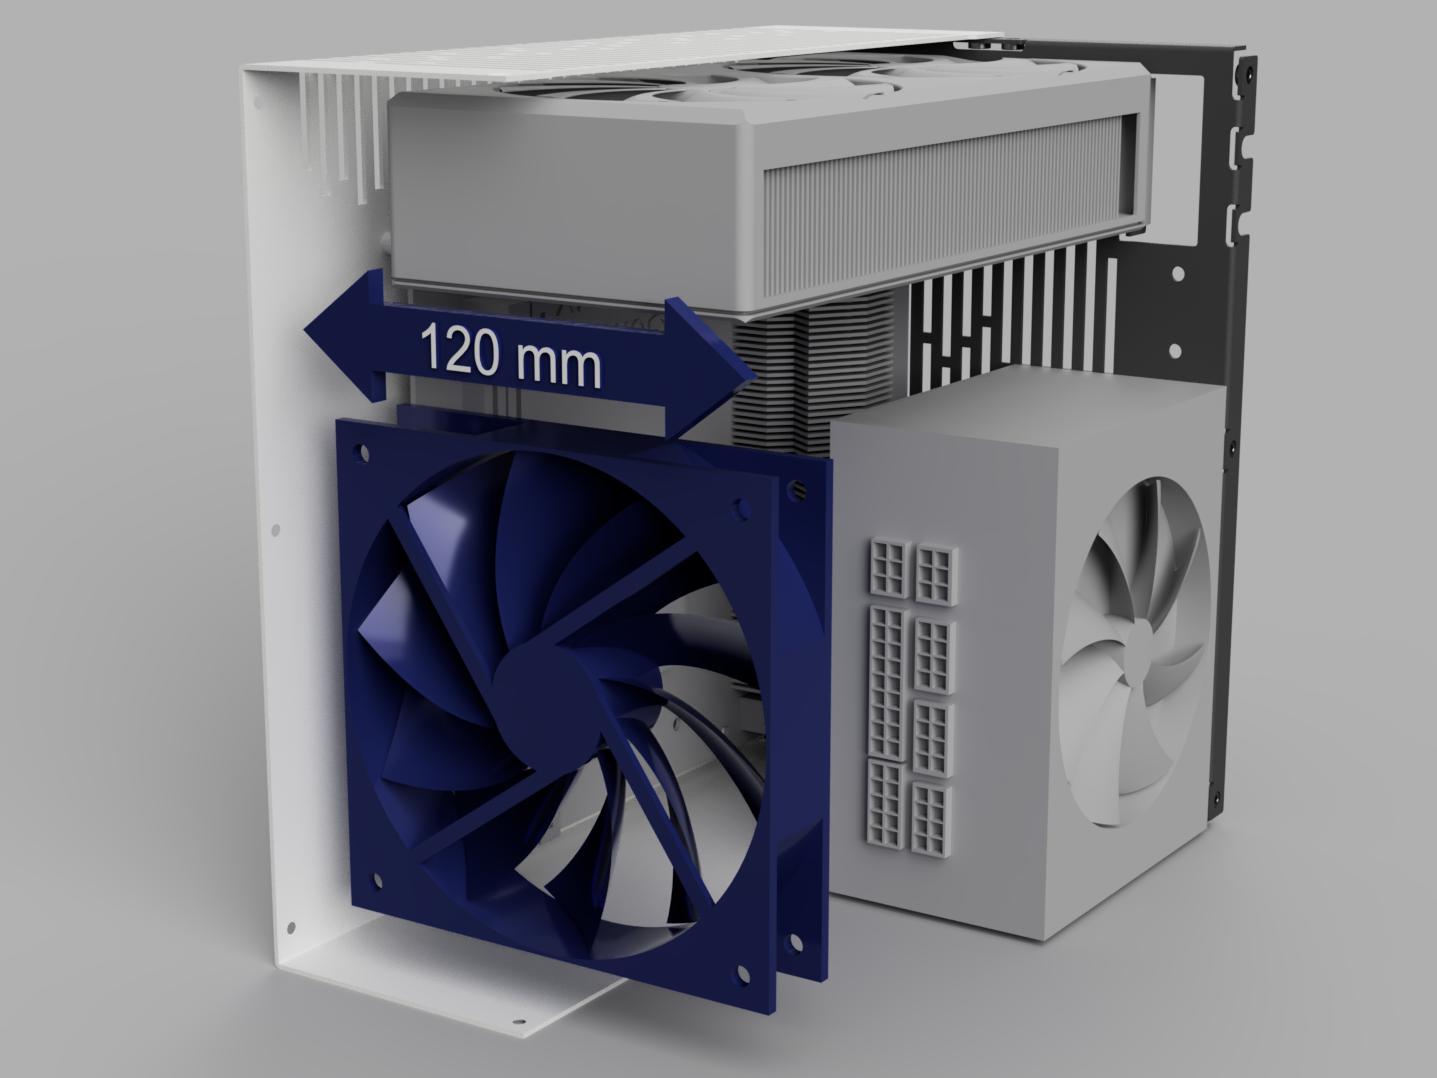
Additional cooling
A front 120mm fan can be mounted to help cooling. It is recommended to mount this fan as an exhaust, pushing air forward out the front, to release warm air from inside the chassis.
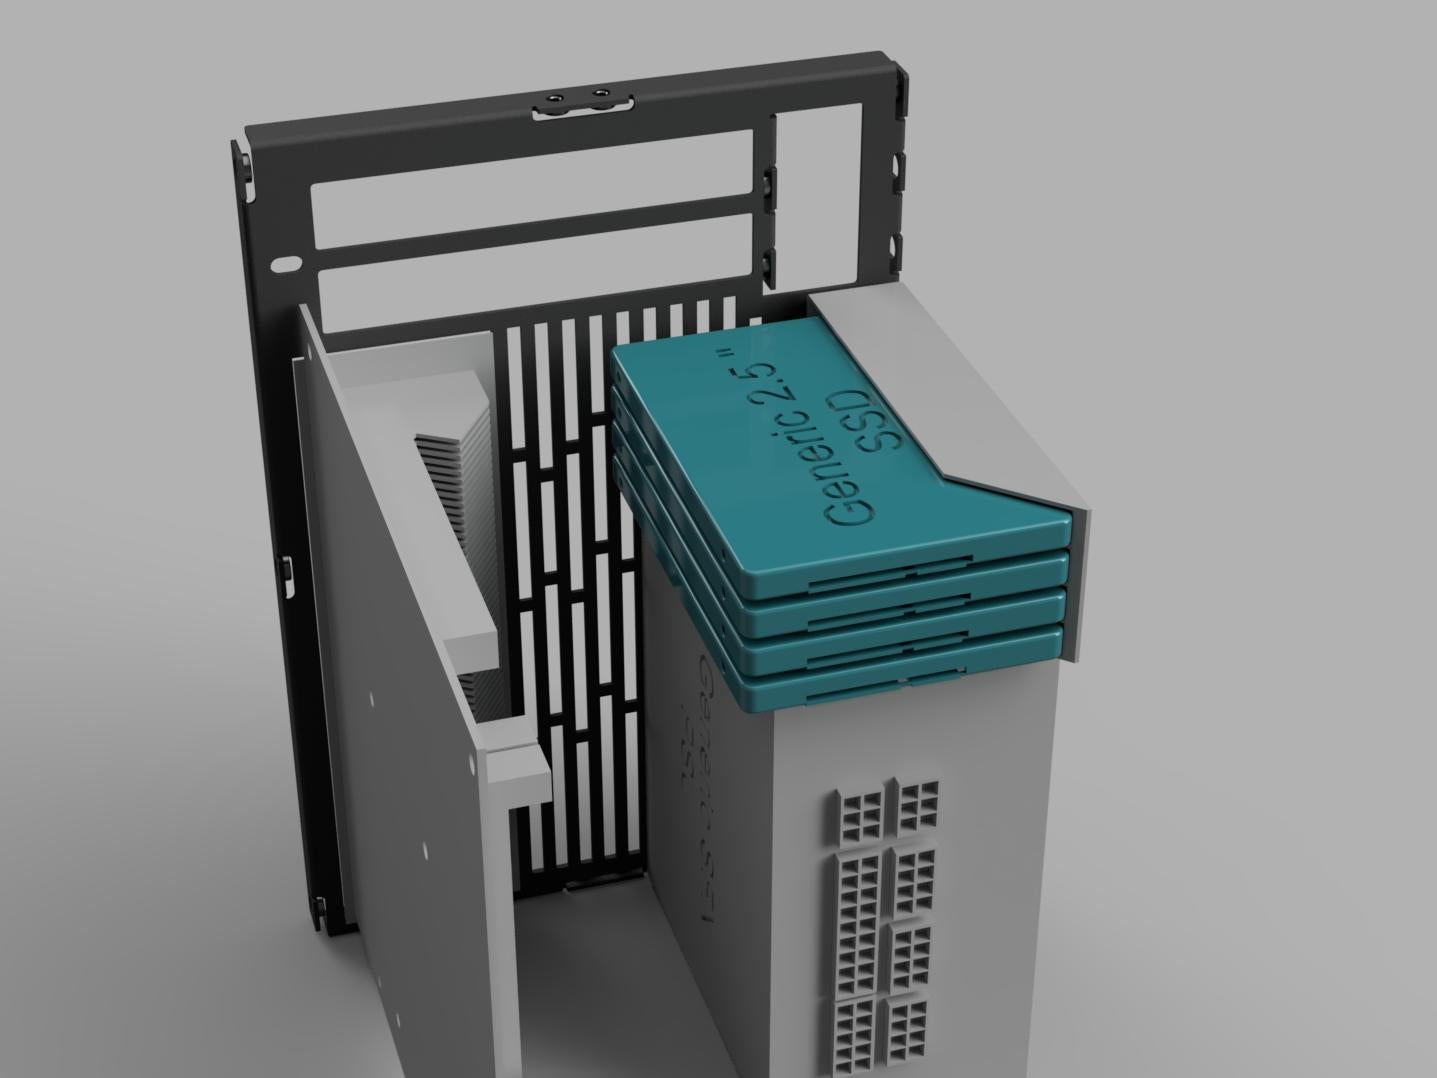
Storage
In addition to the M.2 slots directly on the motherboard, a 3d printed mount attaches above the power supply to mount up to 4 2.5" SSDs.